
If you’re looking to start recording your favorite shows or movies on your Apple TV, there are a few different ways to do it.
Apple TV is a fantastic product; if you have one, you know what I’m talking about. It is a smart TV with many features. You can stream entertainment services like Netflix, Hulu, and much more, play games, exchange messages, make video calls, and use Siri. You can access many of these features and services by using your voice.
However, if you want to use Apple TV to record, you must take a few additional steps.
You can use the set-top box, a USB-C to USB cable, and your PC to create screen captures and video diaries.
On your Apple TV, you won’t be able to record movies or videos protected by DRM (Digital Rights Management). Still, you can record other things like game streams, which is relatively common if you enjoy playing video games. Here are the different ways to record on Apple with easy recorder, QuickTime, and many more methods.
What Do You Need to Record?
- The following steps will help to record on AppleTV plus.
- Internet connection and a personal PC.
- AppleTV plus membership.
- Application for devoted recording.
How to Use QuickTime to Record Apple TV?
Right now, it’s easier than at any other moment in recent memory to record or screenshot your Apple TV from your Mac remotely. Additionally, this guide will lead you through those techniques.
Here are steps on using QuickTime to Record Apple TV.
- Launch QuickTime Player
- Choose Apple TV Recording
- Customize the recording
- Save the Apple TV recording
We’ll go into more details below:
To download the QuickTime player visit this link: https://support.apple.com/kb/DL923?viewlocale=en_US&locale=es_ES
Step 1: Launch QuickTime Player
On your Mac, launch the QuickTime Player, then select File > New Movie Recording from the menu bar.
Step 2: Choose Apple TV Recording
Click on the tiny arrow next to the red button in the new window.
It displays the recording sources that are accessible. You should immediately see your Apple TV here. The Apple TV or any other linked “cameras” will show here.
The camera on your Mac will be used automatically when the recording windows open. You should click the arrow next to the central red record button.
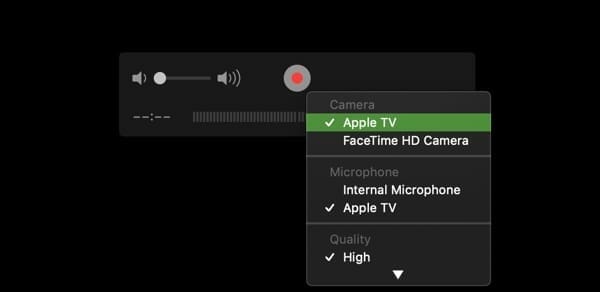
Step 3: Customize the Recording
Select your AppleTv from the under-camera list.
If you want to record audio for screencasts, check the box next to Apple TV under Microphone. Your Apple TV should be mirrored to your Mac as soon as you choose it as the source.
Although DRM-protected video files won’t play with this method, most video content, including YouTube, should be compatible.
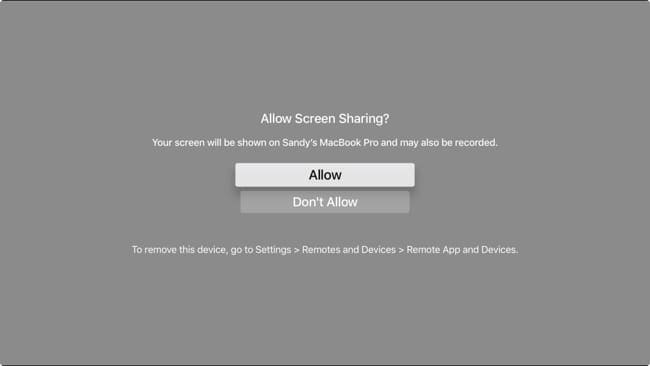
Step 4: Save the Apple TV Recording
You will get a message asking if you want to enable screen sharing when your Tv connects. Press Allow.
Now that your Apple TV screen is visible in the QuickTime Player recording window, you may start recording it.
Just click record to start recording the stream. By clicking the red record button, you can also record a video of your screen.
Please press the button once again to halt recording and save it to your Mac.
Wrapping Up
If you look closely at the parameters, you may adjust the video recording aim, outlining pace and direction, and if necessary, you can even add a time zone. On a MacBook, it essentially includes everything you could want from a screen recorder tool. You’ll find a fantastic option for macOS that is available to you.
Take a look at some of our related articles below.
