
Electronic devices like phones and radios use the antenna to convert electric signals to radio signals. The conversion is two-way. The antennas also covert the radio signals to electric power signals. Ideally, the antenna bands send and receive signals.
The iPhone 11 is equipped with 2 × 2 MIMO antenna types. The iPhone 11 Pro has a 4 × 4 MIMO antenna. The 4 × 4 MIMO antennae improve the signal strength and speed. The iPhone 11 antennae are often placed on the tops and sides of the phone. You can easily check if there are cracks and replace them with a new ones.
How to Replace a Faulty iPhone 11 Antennae with a New One
You can easily replace your broken iPhone 11 antennae at home. To do this, you will need to first check if there are breaks on the sides of your phone. This is because the antennae are often situated either on the sides or top of your device.
Now you will need the following tools for this:
- Proprietary pentalobe screwdriver with 5-ridged teeth
- A standard Philip’s head screwdriver
- Tri-wings screwdriver
- A pair of tweezers
- Plastic prime tool
- A suction cup for pulling the screen apart
- A triangular pick tool
- A metallic prime tool for separating the screen from the phone casing
- A heat gun/hairdryer
Procedure for Replacing your iPhone 11 Antennae
Before starting, switch off your phone completely.
- Remove the pentalobe. Flip your phone and locate the pentalobe screws near the charging port. Use the pentalobe screwdriver to remove the pentalobe screws.
- Warm up the waterproof silhouette of your iPhone. Use a heat gun for about 2 minutes at a considerable distance.
- Separate the screen from the phone system. Place the suction cup on the screen but close to the charging port and pitch the sides of the phone with the thumb. Insert the metallic prime tool underneath the home button location. Insert the plastic pick tool into the gap created and slide along the screen. Do it carefully to avoid damaging other components of the phone. (1)
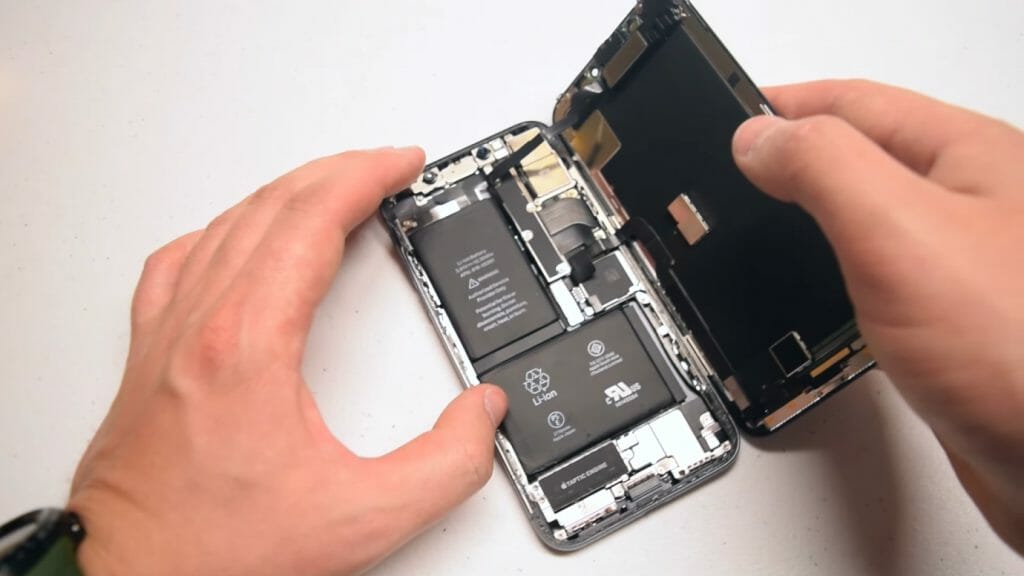
- You can now fold the phone out like a book. Be careful not to cut the two cable attachments located at the top and the middle of the phone. (2)
- Remove the cover which secures all the connections to the screen. Use the Tri-Wing screw to remove the six tri-wing screws that secure the cover. They have different sizes, so make sure you note where each screw is located. Lift the cover, and place it securely on the side.
- Disconnect the 3 cables securing the phone to the screen. Start with the earpiece speaker, then the screen and the digitizer, use the prime tool.
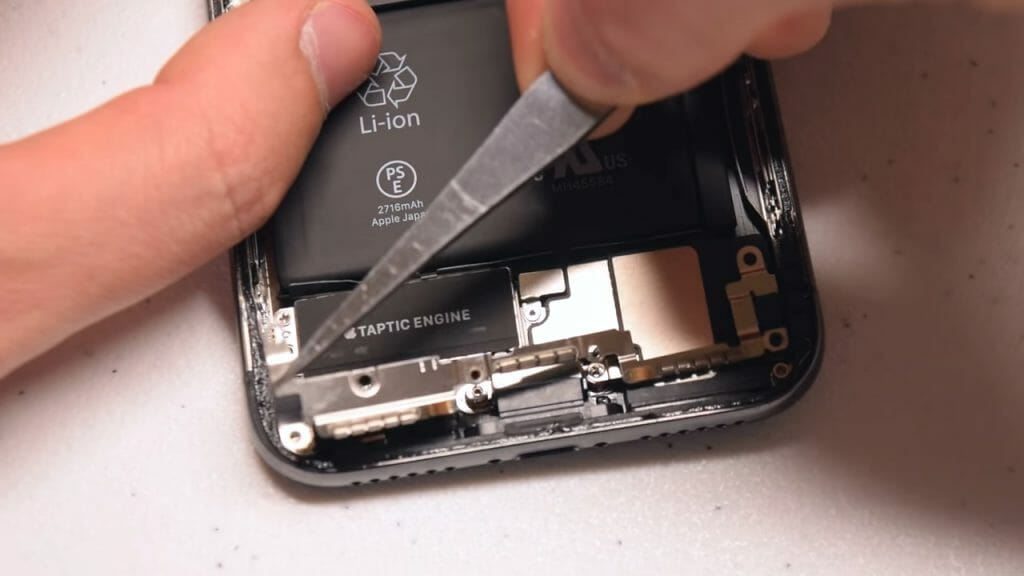
- Now, with the screen apart, remove the antennae bracket. It is secured with 3 Philip’s screws (on the left side of the taptic engine) and 4 y-tip screws. Flip and pop the antenna out of its socket using a prime tool.
- Now replace the antenna with a new one. Make sure it is properly reconnected and tip it over. Secure it into place with its screws.
- Reconnect the screen display cable and the digitizer first. Then follow it with the earpiece speaker cable to put back the screen. Use the plastic prime tool.
- Restore the cover over the connection bridge and shield it with 6 tri-wing screws.
- Power on and test the phone before closing it up. If your phone is okay, align the screen and close it properly. Apply minimum pressure around the phone. You are good to go!
Take a look at some of our related articles below.
References
(1) phone system – https://www.webopedia.com/definitions/phone-system/
(2) book – https://www.penguinrandomhouse.com/the-read-down/21-books-youve-been-meaning-to-read/
Video References
GRIBSOFT
GSMArena Official
